Deploy a Worker with Pulumi
In this tutorial, you will go through step-by-step instructions to deploy a Hello World web application using Cloudflare Workers and Pulumi Infrastructure as Code (IaC) so that you can become familiar with the resource management lifecycle. In particular, you will create a Worker, a Route, and a DNS Record to access the application before cleaning up all the resources.

Ensure you have:
- A Cloudflare account and API Token with permission to edit the resources in this tutorial. If you need to, sign up for a Cloudflare account ↗ before continuing.
- A Pulumi Cloud account. You can sign up for an always-free, individual tier ↗.
- npm ↗ and the Pulumi CLI installed on your machine.
- A Cloudflare Zone. Complete the Add a Site tutorial to create one.
You’ll use a new and empty directory for this tutorial.
mkdir serverless-cloudflarecd serverless-cloudflareAt the prompt, press Enter to log into your Pulumi Cloud account via the browser. Alternatively, you may provide a Pulumi Cloud access token ↗.
pulumi loginTo create a program, run:
pulumi new https://github.com/pulumi/tutorials/tree/cloudflare-typescript-hello-world-beginComplete the prompts with defaults where available; otherwise, provide the requested information. You will need:
- Your Cloudflare account ID.
- Your Cloudflare Zone ID.
- A registered domain. For instance,
example.com - A valid Cloudflare API token.
To create a stack, run:
pulumi up --yesAfter the above command completes, review the value of myFirstOutput for correctness.
From the output above, follow your View in Browser link to get familiar with the Pulumi stack.
Example:
View in Browser (Ctrl+O):https://app.pulumi.com/diana-pulumi-corp/serverless-cloudflare/dev/updates/1
You will now add a Cloudflare Worker to the Pulumi stack, dev.
Replace the contents of your index.ts file with the following:
import * as pulumi from "@pulumi/pulumi";import * as cloudflare from "@pulumi/cloudflare";import * as fs from "fs";
const config = new pulumi.Config();const accountId = config.require("accountId");
// A Worker script to invokeexport const script = new cloudflare.WorkerScript("hello-world-script", { accountId: accountId, name: "hello-world", // Read the content of the worker from a file content: fs.readFileSync("./app/worker.ts", "utf8"),});npm install @pulumi/cloudflarepulumi up --yesYou can view your Cloudflare resource directly in the Cloudflare Dashboard to validate its existence.
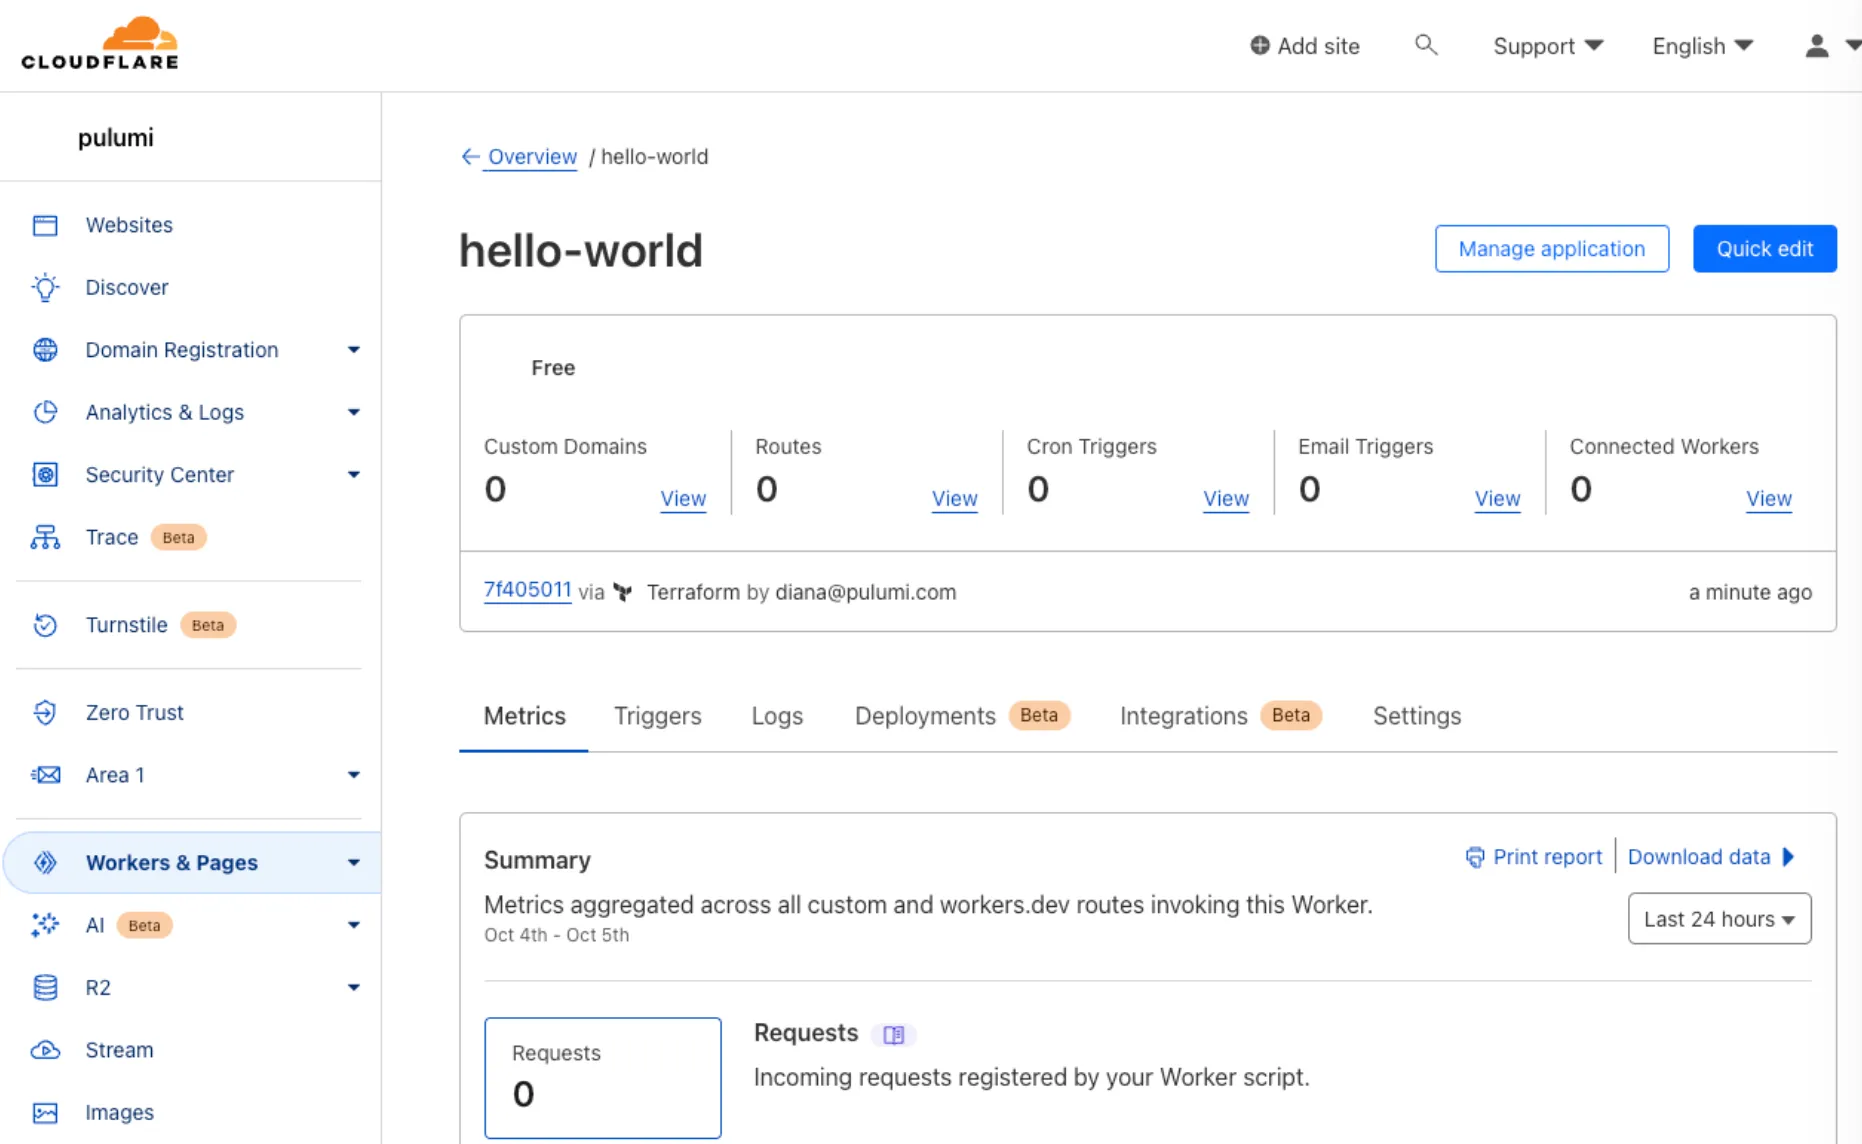
- Log into the Cloudflare dashboard ↗.
- Select your account.
- Go to Workers & Pages.
- Open the “hello-world” application. Example:
You will now add a Worker Route to the Pulumi stack, dev so the script can have an endpoint.
Replace the contents of your index.ts file with the following:
import * as pulumi from "@pulumi/pulumi";import * as cloudflare from "@pulumi/cloudflare";import * as fs from "fs";
const config = new pulumi.Config();const accountId = config.require("accountId");const zoneId = config.require("zoneId");const domain = config.require("domain");
// A Worker script to invokeexport const script = new cloudflare.WorkerScript("hello-world-script", {  accountId: accountId,  name: "hello-world",  // Read the content of the worker from a file  content: fs.readFileSync("./app/worker.ts", "utf8"),});
// A Worker route to serve requests and the Worker scriptexport const route = new cloudflare.WorkerRoute("hello-world-route", { zoneId: zoneId, pattern: "hello-world." + domain, scriptName: script.name,});pulumi up --yesIn the Cloudflare Dashboard, the Worker application now contains the previously defined Worker Route.
- Log into the Cloudflare dashboard ↗.
- Select your account.
- Go to Workers & Pages.
- Select your application.
- For Routes, select View to verify the Worker Route details match your definition.

You will now add a DNS record to your domain so the previously configured route can be accessed via a URL.
Replace the contents of your index.ts file with the following:
import * as pulumi from "@pulumi/pulumi";import * as cloudflare from "@pulumi/cloudflare";import * as fs from "fs";
const config = new pulumi.Config();const accountId = config.require("accountId");const zoneId = config.require("zoneId");const domain = config.require("domain");
// A Worker script to invokeexport const script = new cloudflare.WorkerScript("hello-world-script", {  accountId: accountId,  name: "hello-world",  // Read the content of the worker from a file  content: fs.readFileSync("./app/worker.ts", "utf8"),});
// A Worker route to serve requests and the Worker scriptexport const route = new cloudflare.WorkerRoute("hello-world-route", {  zoneId: zoneId,  pattern: "hello-world." + domain,  scriptName: script.name,});
// A DNS record to access the route from the domainexport const record = new cloudflare.Record("hello-world-record", {  zoneId: zoneId,  name: script.name,  value: "192.0.2.1",  type: "A",  proxied: true,});
export const url = route.pattern;pulumi up --yes- In your browser, open your Pulumi Cloud ↗
- Navigate to your stack,
serverless-cloudflare/dev. - Confirm all the defined resources are created and healthy. Example:

You have incrementally added all the Cloudflare resources needed to run and access your Hello World application. This was done by defining the resources in TypeScript and letting Pulumi handle the rest.
You can test your application via the terminal or browser.
- In the terminal
pulumi stack output urlhello-world.atxyall.comcurl "https://$(pulumi stack output url)"<!DOCTYPE html> <html> <head> <title> Hello World </title> </head> <body> <h1>Serverless with Pulumi</h1> <p>The current time is: <span id="date">Thu Oct 05 2023 22:02:17 GMT+0000 (Coordinated Universal Time)</span>.</p> <script defer src="https://static.cloudflareinsights.com/beacon.min.js/v8b253dfea2ab4077af8c6f58422dfbfd1689876627854" integrity="sha512-bjgnUKX4azu3dLTVtie9u6TKqgx29RBwfj3QXYt5EKfWM/9hPSAI/4qcV5NACjwAo8UtTeWefx6Zq5PHcMm7Tg==" data-cf-beacon='{"rayId":"8118f2b5ddb5eb02","version":"2023.8.0","r":1,"b":1,"token":"240f365d9d42457597f861e6e46c6ce9","si":100}' crossorigin="anonymous"></script></body> </html>- In your browser, open
hello-world.YOUR_DOMAIN.com
Example:
In this last step, you will run a couple of commands to clean up the resources and stack you used throughout the tutorial.
pulumi destroypulumi stack rm dev